How to fix loose trim?
- Introduction
- Why is my trim not securely fastened to the wall?
- Where to install the nails?
- What kind of nails?
- What kind of hammer?
- Predrilling nail holes
- How to countersink the nail?
- How to fill the nail holes?
- How to sand the puttied nail holes?
Introduction
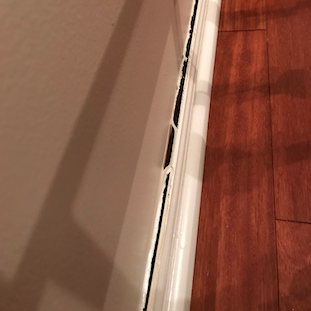
Prior to repainting trim, you need to ensure it is securely attached to the wall. If there is movement, eventually a visible crack between the trim and the wall will form. A good test is to press the trim gently with your hand look fo movement. If it moves, you may want to resecure the trim to the wall with additional finishing nails.
Why is my trim not securely fastened to the wall?
Sometimes when the trim is installed, nails or construction stables are not driven into the studs or baseplate. Drywall is not dense enough to securely hold a staple or nail.
Where to install the nails?
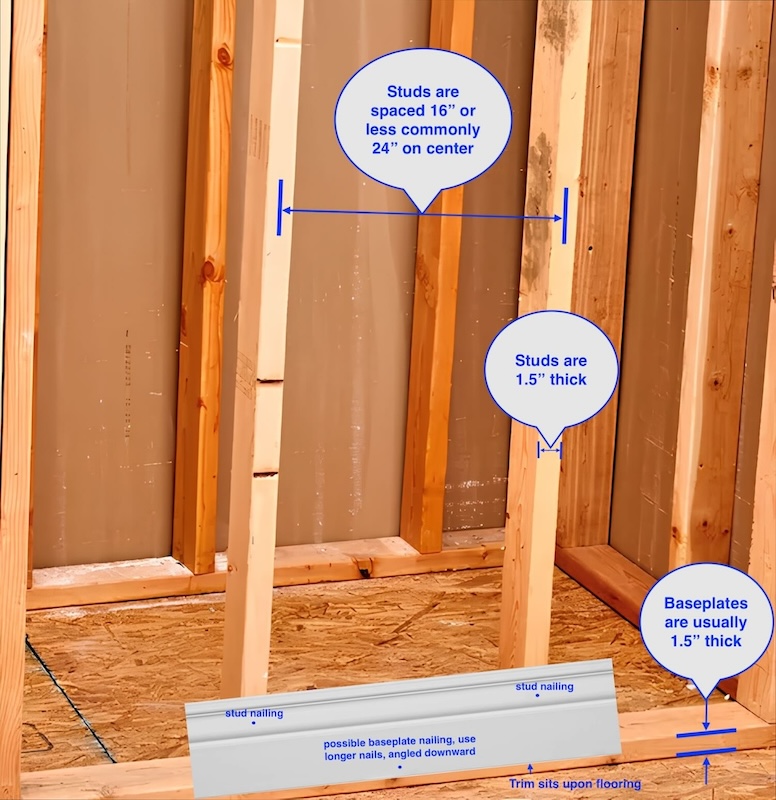
You need to be mindful of how your wall is constructed, behind the drywall. Here is an example of how walls are typically framed. And also where trim nails can be installed.

What kind of nails?
You need to use what is referred to as a “finishing nail”. The key feature is the ability to countersink the nail, or drive it below the surface of the wooden trim surface so that it can be concealed. The required length of the nail will depend upon a number of factors such as thickness of the drywall and trim. But usually a 2” long nail is a good choice for nails being driven into the studs.
- Finish nails are used for attaching trim and fine woodwork.
- The cupped head countersinks when driven into trim, giving a more finished look.
- Smooth shank and small head design make countersinking, filling and finishing easy.
If you elect to drive some nails into the baseplate, in addition to the studs, consider a longer nail such as Hillman’s 2.5” finishing nail.
If your trim is going to be painted, the nail holes can be easily concealed later. However, if your trim has a natural wood finish and you do not intend to paint it, you need to try to minimize the size of the nails that you use. Try shorter nails initially perhaps.
What kind of hammer?
A Finish Hammer is lightweight, typically 10 to 16 ounces, with a smooth face so to minimize marring the surface of wood. If you aren’t driving nails all day, there is no need to spend a lot. I recommend something simple but with the correct specifications.
- Head Weight: 10 oz.
- Total Length: 11 1/4 in.
- Smooth face.
- Straight handle
- Traditional hickory handle
Predrilling nail holes
Although not always necessary, if your trim is thinner or consists of hardwood you run the risk of the wood splitting while driving in nails. You will be very unhappy with the result if that happens. And so I recommend drilling nail pilot holes when making repairs to existing trim.
The size of the drill bit is important. Too large, and the nail will not be capable of actually securing the trim. Too small, and you risk splitting the trim. A good rule of thumb is that the pilot drill bit should be roughly 1/2 the diameter of the nail. For a 6D nail I recommend using a 3/64” drill bit. It is a good idea to have extra drill bits if your project is large. It is easy to break a drill bit if you aren’t careful.
You will also need a drill. Do yourself a favor and get a cordless drill.
- 1/2inches Keyless chuck for fast and easy bit changes
- Led light improves visibility in dark work areas
- 20V max Lithium battery with high performance cells provides ample runtime and increased performance
How to countersink the nail?
Countersinking the nail involves driving it just below the surface of the wood. This is done using a nail set, also known as a punch. After that, wood putty is used to cover it to achieve a flat surface.
- Three different sizes
- Flared grips to help protect hands against glancing blow
- Hardened Tip for durability
- Craftsman's lifetime warranty
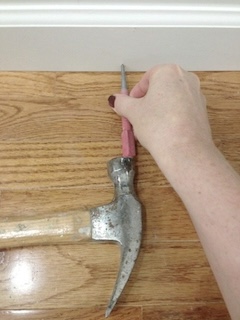
You can start driving the nail using just the hammer. And then when it is almost flush against the surface use the nail set tool to inset the nail.

How to fill the nail holes?
You should use wood putty to conceal the cavity of the inset finishing nails that you installed. There are a lot of varieties of wood putty available. I like this kind because cleanup is easy. If you are going to be repainting the trim, the color of the wood putty doesn’t matter.
- Easy-to-use, latex-based formula can be sanded, planed, cut, drilled, screwed, nailed, sanded & painted, unlike many wood putty fillers
- White wood filler is shrink, crack & crumble resistant with strong nail & screw anchoring for easy wood repairs
- Thick, knife grade formula can be molded and sculpted allowing it to fill any shape imperfection
- Low odor spackle dries in 3 to 6 hours for repairs up to 1/8" in depth and 36 hours for deeper fills 1/4" and over
Apply the wood putty with a putty knife. On the initial pass try to force it into the cavity of the inset finishing nail that you installed. Assuming you are going to be painting the trim, I also recommend applying a thin coat on top of the filled hole too, to be sanded smooth in the next step.
How to sand the puttied nail holes?
I recommend using a good quality 180 grit sandpaper such as 3M Pro Grade.
If the sanded surface is on a contoured section of the trim, just hold the sandpaper with your hand.
However if many of your nail holes are on a flat surface of the trim, I recommend using the Warner Tool Rubber Sanding Block.
Your goal is to sand the puttied surface flat, as assessed by gliding your finger across it. Don’t make the mistake of sanding off all the wood putty.
(Updated: )


